Discover the benefit of ultrasonic cleaning
Getinge has 20 years of experience in the design and manufacture of innovative, versatile, and energy-efficient ultrasonic cleaning systems. Our ultrasonic systems are designed to accommodate all sterile processing needs, from small facilities to high-throughput trauma centers. We provide a comprehensive range of ultrasonic cleaning systems to fit any departmental need and budget.
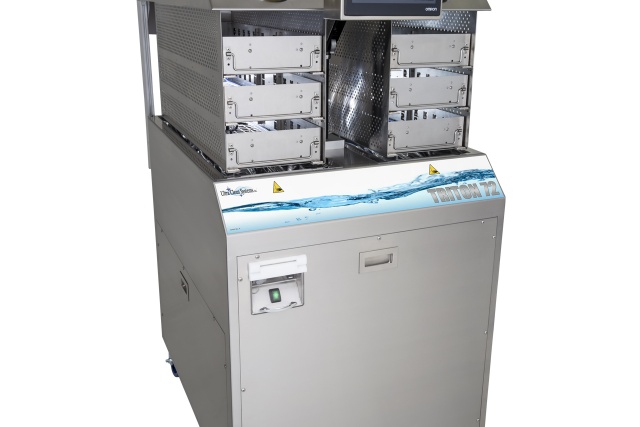
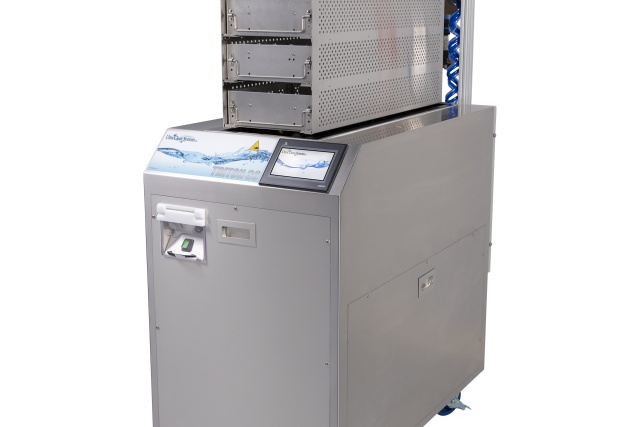
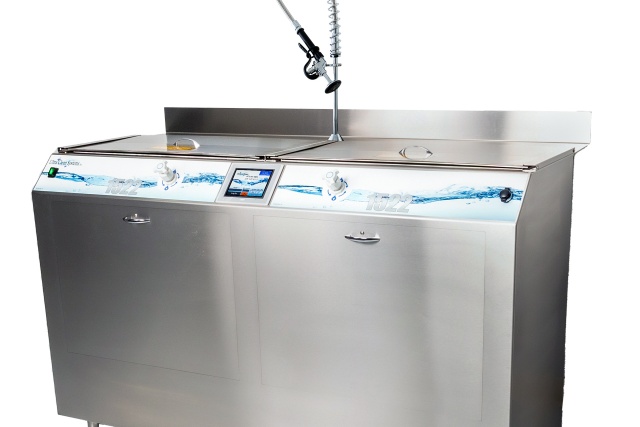
Ultrasonic Solutions At-a-Glance
Ultrasonic Solutions At-a-Glance
Choosing the best ultrasonic for your SPD
What do you need to know to choose the best ultrasonic surgical instrument cleaner for your sterile processing department (SPD)? There are several things to consider. The most important are the number and type of instruments your department reprocesses on its busiest days and the space available for your machine.
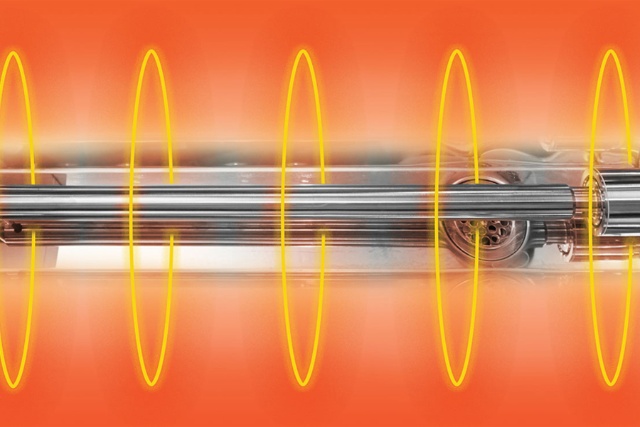
TRT technology & benefits
Thanks to its surgical-grade titanium and direct-in-water energy injection, TRT technology delivers:
- More power and reduced cleaning times compared to bonded transducers
- 8- to 13-minute adjustable ultrasonic cleaning cycles
- 15-minute dedicated da Vinci® robotic instrument cleaning cycles
- Longer life for the ultrasonic basin
- Less maintenance, reducing machine downtime and associated costs
The result? The surface area of each item in the tank is exposed to powerful TRT cavitation, enabling effective cleaning. In addition, cycle times are reduced by 5 minutes and the need for a separate degassing is eliminated, yielding a total time reduction of 10 minutes per cycle.
Many ultrasonic cleaning systems pass their energy from a series of surface-mounted transducers, via a bonding agent, through the metal basin, and into the water. This results in a power loss of around 20%. With TRT technology, this power loss is greatly reduced, thus the cleaning cycles are significantly shortened, allowing instruments to be available for the next case.

UV light technology & benefits
Getinge's Triton series ultrasonic cleaners’ UV filtration system destroys bacteria and viruses during the cleaning process.
After flushing any lumen or robotic instruments, the water passes over the UV light as it recirculates through the basin, killing any microbes dislodged during the cleaning process.
Getinge was the first company to incorporate this important safety feature into its technology.
More sterile reprocessing content

CE Series: Beyond the Bubble
This series, “Beyond the Bubble: An Inside Look at Ultrasonic Cleaners,” is focused on helping you understand the intricate anatomy that makes these unique cleaning devices such a critical piece of the reprocessing workflow. Read the 15 segments and take a quiz for two 2 CE credits. (Approved for HSPA and CBSPD)
Introduction: Welcome to this Getinge social media CE series entitled “Beyond the Bubble: An Inside Look at Ultrasonic Cleaners,” focused on helping you understand the intricate anatomy that makes these unique cleaning devices such a critical piece of the reprocessing workflow. As we embark on this educational journey together over the next few weeks, we will demystify the essential components of ultrasonic cleaners, and take you beyond what is commonly known about ultrasonic technology.
This series is designed to guide you step by step, offering insights, best practices, and knowledge that is applicable to your daily tasks in Sterile Processing. We invite you to actively participate and engage in this learning experience, which will not only enhance your individual skills but contribute to the broader goal of patient safety and care. Feel free to comment, ask questions, and share what you are learning with your peers across the industry. Join us as we venture beyond the bubble, unraveling the complexities of ultrasonic cleaners and embracing the future of Sterile Processing.
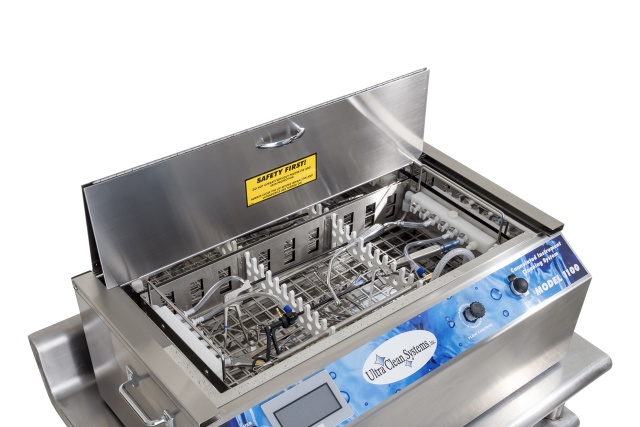
The Tank: The tank or basin within an ultrasonic cleaner is where the cleaning process actually occurs, as it serves as the holding area for water, cleaning chemistries and the items to be cleaned. Constructed with precision from stainless steel, this component is paramount for its durability and resilience against various cleaning agents and constant exposure to ultrasonic energy. Tank sizes are an important consideration, as it will impact the volume of instruments that can be cleaned at one time, as well as the size or length of instruments that will fit in the cleaner.
As sterile processing professionals, the design and functionality of multi-basin systems are worth considering as well. These systems allow for ultrasonic cleaning of different devices, at different times, within the same unit. With the size and configuration of the tank varying based on the specific model and purpose, it’s important to understand how best to optimize its use in your workflow. Overloading the tank can create shadows of ultrasonic energy, diminishing the overall cleaning efficacy. To guard against this, maintain balanced loading practices and adhere to specific loading guidelines for your device IFUs.
Water: Water, though often overlooked, plays a pivotal role in the ultrasonic cleaning process. Serving as the medium in which detergents and ultrasonic waves interact, water provides the foundational solution required to carry out the proper cleaning of surgical instruments. The quality of the water used must be rigorously controlled and aligned with industry guidelines to prevent premature damage to the equipment or interference with the cleaning process.
There are two “categories” of water quality that should be considered for ultrasonic cleaning: Utility Water and Critical Water. Utility Water is water that comes from that tap, used for washing, flushing, and rinsing surgical instruments. This is the water that will fill the basin of the ultrasonic cleaner, and it should meet the minimum specifications according to AAMI ST108, “Water for the Processing of Medical Devices.” Critical Water is water that has been extensively treated (usually by RO, DI, or distillation) to ensure the microorganisms and other material are removed from the water. If the ultrasonic cleaner specifies, critical water might be used in the final rinse of the ultrasonic cleaner.
Detergent: The cleaning chemistries used in ultrasonic cleaners play a vital role in the removal of debris from surgical instruments, working synergistically with the ultrasonic energy to achieve optimal cleaning. In a medical setting, the chemistries for ultrasonic cleaners often includes a combination of enzymatic detergents, which are specifically designed to enhance soil removal, particularly proteins like what are found in blood and other organic soils. This collaborative process is further supported by surfactants, which decrease surface tension, thus increasing the energy of cavitation implosion.
Sterile Processing professionals should give careful consideration to the detergent selected for their ultrasonic cleaner, as the detergent should:
- Aid in thorough cleaning
- Be effective across a broad spectrum of water qualities
- Be compatible with the devices being cleaned
- Be low foaming
- Be free rinsing.
Detergents that are not compatible with the medical device could cause damage to the device over time with repeated reprocessing. More than that, an incompatible detergent may leave behind residues on the instrument which could interfere with further processing such as disinfection or sterilization. This is why rinse-ability is an important factor for ultrasonic chemistries, ensuring that instruments are free from both debris and chemical residues. Finally, it is the Sterile Processing professional’s duty to ensure the ultrasonic chemistry is being used according to its instructions with respect to dilution ratios and temperature. In the world of cleaning chemistries, more detergent does not necessarily mean cleaner instruments.
Cavitation: The fundamental process that empowers ultrasonic cleaners to be so effective is called cavitation. Cavitation refers to the formation, growth, and implosive collapse of microscopic bubbles in a solution. Cavitation happens when ultrasonic waves pass through the cleaning solution and create high-pressure and low-pressure cycles. During the low-pressure phase, microscopic bubbles or “cavities” form, and as the high-pressure wave follows, these bubbles implode.
The reason this is significant for healthcare is because these imploding bubbles produce extreme temperatures and pressures locally, essentially creating “micro-jets” of cleaning solution that impact the surface of the instrument being cleaned. This method is very effective at dislodging contaminants at a microscopic level, which makes it particularly useful for cleaning complex medical devices with difficult-to-reach areas, often inaccessible by manual cleaning methods.
The Generator: How does an ultrasonic cleaner create the ultrasonic energy for cavitation? The generator, also referred to as the power supply, plays a vital role in an ultrasonic cleaner by producing the high-frequency electrical energy required to power the transducers. This transformation of facility current into high-frequency electrical energy is what enables the transducers to generate mechanical vibrations. These vibrations create cavitation bubbles, which are central to the cleaning process. The generator operates at varying frequencies, typically ranging from 20kHz to 400kHz.
The varied frequencies supplied by the generator to the ultrasonic transducers has a direct effect on the cleaning performance of the cleaner. Higher frequencies produce smaller bubbles with decreased cavitation energy in the solution. The smaller bubbles can affect cleaning in smaller areas but take considerably longer to clean. Lower frequencies produce larger bubbles with greater cavitation energy in the solution. The more turbulent cleaning process caused by lower frequencies emitted can clean faster, but over time can shorten the life and quality of the instrument. The Ultrasonic generator and transducers should be balanced and optimized to produce a safe and effective cleaning process for surgical instruments.
Transducers: Transducers serve as the heart of ultrasonic cleaners, performing a critical role in converting electrical energy into high-frequency mechanical vibrations that generate cavitation within the solution. These vibrations are central to the ultrasonic cleaner's ability to thoroughly clean surgical instruments and other medical tools. Depending on the size of the ultrasonic cleaner, there will be multiple transducers placed around the tank to emit ultrasonic energy into the tank.
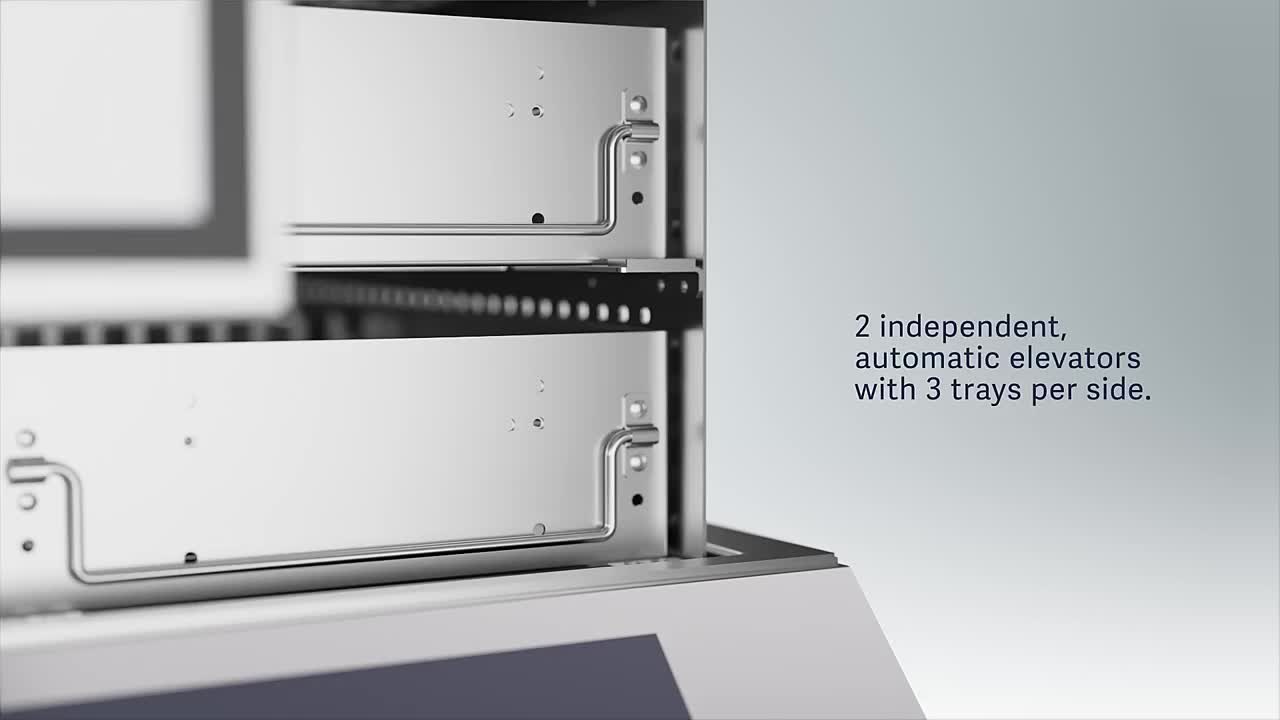
One of the challenges ultrasonic transducers face is “cold spots” in the cleaning solution—areas which receive reduced cavitation due to the positioning of the transducers. Bonded transducers, which are affixed to the base of the cleaning tank and emit energy upward in conical fields, can experience cold spots in between the transducers. Titanium Rod Transducers (TRT) produces high cavitation energy output with a titanium rod that sits inside the basin rather than being fixed below it, providing uniform energy distribution and eliminating cold spots. This technology can lead to increased cleaning power in a shorter wash-cycle time than bonded transducers.
Heating Element: The heating element within an ultrasonic cleaner serves the vital purpose of heating the cleaning solution to enhance its cleaning effectiveness, especially against stubborn soils found on surgical instruments. Exact temperature requirements may vary based upon the specific cleaning solution used, the type of material being cleaned, and institutional policies. However, best practice suggests that for enzymatic detergents, a temperature range of 90°F to 120°F Is optimal for enzymatic activity and cleaning performance. As always, check the manufacturer recommendations for your detergent for temperature requirements.
Understanding the temperature requirements for cleaning is significant, because when your ultrasonic cleaner fills, it may require time to come up to temperature before being ready for that first cycle. If your ultrasonic cleaner does not have a heating element, the temperature of the cleaning solution should be monitored. If the cleaning solution cools below the required temperature for your detergent, the cleaning solution should be discarded and replaced.
Utilities: While the operation of ultrasonic cleaners in Sterile Processing is pretty straightforward, the installation of one requires some careful thought. Like other mechanical washers, ultrasonic cleaners are far from being “plug and play.” Every piece of equipment is going to have different requirements for utilities; here are some that your equipment may need:
- Electrical – First and foremost is the electrical supply, which must be consistent and reliable, and match the specifications of the equipment spec sheet.
- Water – Equipment will vary on which kinds of water must be supplied to the unit. Some of the smallest units require no water supply, and the user must manually fill the tank. Other cleaners may require a cold water supply, hot water, or both. Advanced machines that perform final rinses may also require critical rinse water, which has been further treated to remove contaminants and ions.
- Drainage – Ultrasonic Cleaners must be regularly drained and refilled. Proper functioning drains are important to prevent overflows and back-up. It can be tempting to have the ultrasonic share existing sink or washer drains, but be certain that the drain is adequately sized to handle the ultrasonic washer draining at the same time as the sink or washer it is sharing with.
Control Panel: The control panel and display of an ultrasonic cleaner serve as the central command interface, enabling the user to manipulate various operational parameters such as time, temperature, frequency, and special cleaning cycles. This interface may be digital or analog, depending on the model. Through the control panel, users can adjust cleaning settings to match the specific requirements of the instruments being cleaned, enhancing both efficiency and effectiveness. Alert messages are displayed when errors occur, providing immediate feedback and guidance for troubleshooting. Some control panels may also offer lock-out options to prevent unauthorized tampering, ensuring consistent cleaning results and compliance with standardized protocols. Familiarity with the control panel's functions, features, and programming options is essential for the sterile processing technician. Mastery of this interface leads to optimized cleaning processes and a higher level of confidence in the reprocessing of surgical instruments. In essence, the control panel and display act as the user's direct connection to the ultrasonic cleaner's capabilities, facilitating a tailored and responsive approach to instrument cleaning.
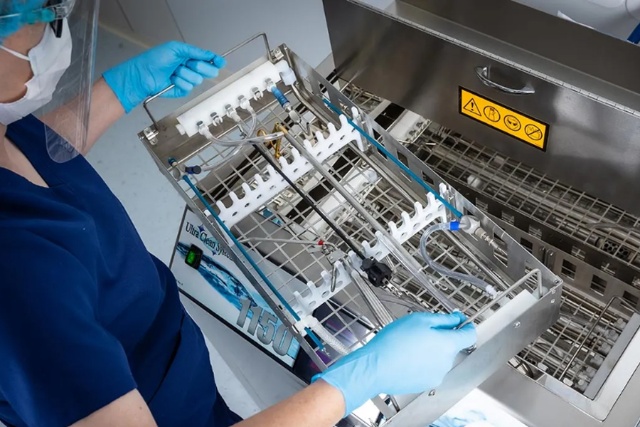
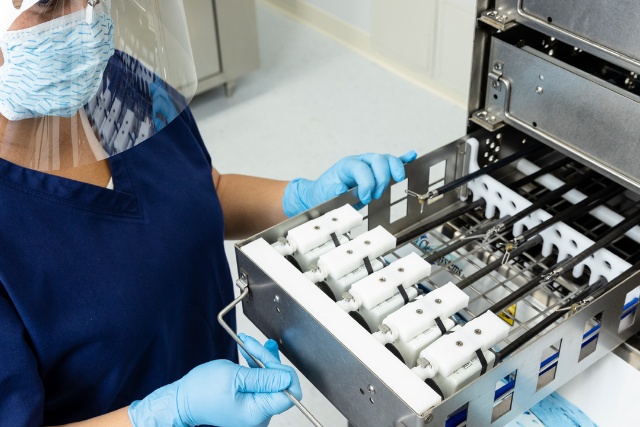
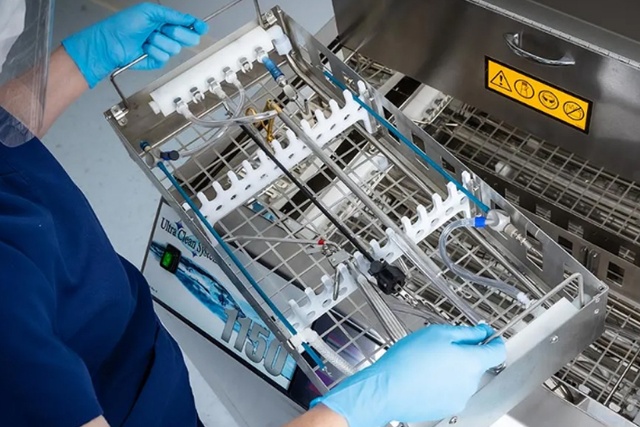
Lumen Connections: Lumens are naturally a hard challenge for Sterile Processing to clean. We can’t get very large brushes down them, you can’t see inside them (without a borescope), and soil tends to get forgotten about inside them. But the ultrasonic cleaner is one of the best tools we have in Sterile Processing to help us clean lumens. It gives you the ability to get into the lumens in a way you could not before.
Many ultrasonic cleaners, even small table-top units, have accessories that attach to lumens and flush cleaning solution through the lumen during the cycle. This irrigating action adds another element of friction inside the lumen in addition to the cavitation action happening in the chamber. The turbulent flow ensures cleaning solution reaches the entire length of the internal channels in these instruments, ensuring a more comprehensive cleaning. Technicians utilizing the lumen cleaning connectors should ensure each connector is appropriately sized and properly seated for the instrument being cleaned. While some attachments are designed with luer connections for suction tips or laparoscopic suctions, other attachments are designed specifically for complex instruments such as robotic instruments.
Trays: Odds are you are not dropping your instruments straight into the ultrasonic cleaner. Trays and baskets are essential to keep instruments together as they are loaded and unloaded from the ultrasonic cleaner, and they protect instruments from directly contacting the ultrasonic transducers in the base of the tank. But did you know that some baskets and trays can inhibit ultrasonic cleaning? Trays without perforations, or with mesh that is too fine, can inhibit ultrasonic energy from reaching the instruments in the bottom of the basket. Small mesh holes also tend to bring air bubbles with it down into
Trays should be made of a compatible material and specifically designed to facilitate ultrasonic cleaning. Silicone mats are also a popular liner for the bottom of instrument baskets to protect surgical instruments, but they too can inhibit the cavitation cleaning process in your ultrasonic cleaner. Before ultrasonic cleaning, silicone mats should be removed, and instruments should be placed in a mesh basket that allows cavitation bubbles to fully encompass the instruments.
The Lid: It may seem like the lid of your ultrasonic cleaner is an afterthought, but the lid is an essential component for ultrasonic cleaning. The ultrasonic cleaning cycle is a turbulent process, and the cavitation energy tends to aerosolize the cleaning solution, potentially spreading contaminants into the air. With the lid closed during the cycle, contaminants are contained within the tank and are not given the opportunity to aerosolize.
Many ultrasonic cleaners have automated lids that will close and lock during the cleaning cycle, preventing the user from opening the lid mid-cycle. However, if your unit does not have an automated lid, requiring the user to manually open or close the lid, technicians should be informed that the lid should stay closed during the entire wash cycle of the ultrasonic cleaner. This recommendation can be found in various best practice documents published by AORN and AAMI, but you may also find it to be a requirement in your equipment manufacturer’s IFU. Read through those instructions carefully, and always follow the equipment manufacturer’s requirements for operation.
Common Mistakes: As we continue to explore the anatomy of ultrasonic cleaners, it is important to consider some of the common mistakes that users make with their ultrasonic cleaners that can undercut the cleaning process.
Not Degassing the Cleaning Solution – Inert gasses dissolved in the cleaning solution can dampen the effectiveness of ultrasonic cleaning. Cavitation energy first attacks the inert gasses, leaving less energy for instrument cleaning. Every time the ultrasonic cleaner is filled with new cleaning solution, it must be degassed before use to ensure effective cleaning. If this is not done automatically by your ultrasonic cleaner, it is performed by running a brief cycle without any instruments.
Shortcutting the Cycle Time - Time is a critical parameter in any cleaning (and sterilization) workflow, and it’s tempting to shorten ultrasonic cleaning cycles for the sake of speed. However, doing so is not just a procedural misstep but also a risk to patient safety. Each device comes with manufacturer-specified instructions for use (IFUs) that outline the required cycle time for effective cleaning. Not adhering to these guidelines can result in suboptimal cleaning, leaving behind organic and inorganic residues on the instruments.
Mixing Metals in the Ultrasonic Cleaner – Not all materials are compatible with ultrasonic cleaning. Some materials like aluminum, brass, copper, and chrome can cause instrument staining and damage to stainless steel instruments when cleaned in the same ultrasonic cleaning cycle. Check the compatibility of your instrument materials before washing in an ultrasonic cycle and avoid mixing metals varieties in the chamber.
As we come to the end of our series "Beyond the Bubble: An Inside Look at Ultrasonic Cleaners," let's pause to reflect on the broader impact of our work in Sterile Processing. Each cycle we start on an ultrasonic cleaner is a testament to our role as guardians of instrument cleanliness and contributors to the overall surgical outcomes of patients.
This series has sought to demonstrate the complexity of ultrasonic cleaners, balancing intricate variables of cavitation, cleaning agents, water quality, and cycle timings to effectively clean instruments. But standing beside the closed lid of every ultrasonic cleaner in healthcare facilities worldwide is a Sterile Processing professional tasked with the responsibility of delivering clean surgical instruments for sterilization. They need to be aware of the intricacies of ultrasonic cleaning, the process it requires, and any warning signs that may require further scrutiny.
However, the ultimate beneficiary of our collective expertise and diligence is the patient. Though they may not know the science and labor that go into preparing their surgical instruments, their trust is implicitly placed in the hands of healthcare professionals. They rely on us to implement the latest technology and best practices to ensure their safety and well-being.
We hope this educational series has helped equip you and your team to dig deeper into the anatomy and concepts of ultrasonic cleaning and has piqued your curiosity to continue learning. More than that, we hope that you’ll now have the tools needed to improve the ultrasonic cleaning workflow at your healthcare facility, better understanding the equipment your team works with every day.
Thank you for your active participation and dedication throughout this series. Together, we’re not just elevating a profession; we are contributing to the global mission of safer, surgical care.
Have you reviewed the Beyond the Bubble series and are ready to take the quiz for 2 CE?

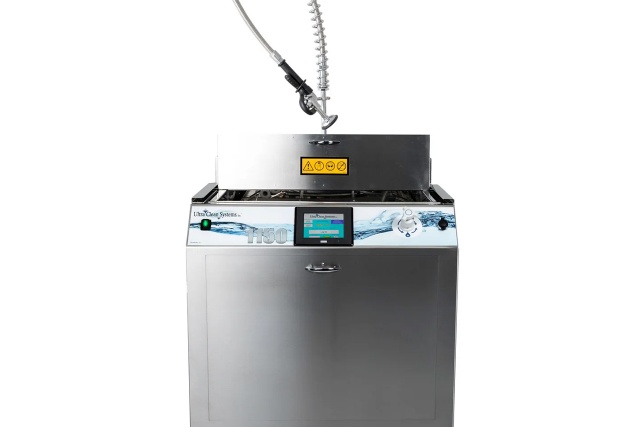
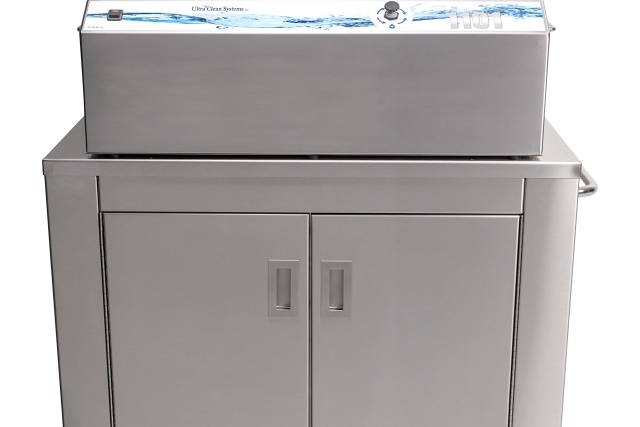
Getinge Ultrasonic Solutions
Ultra Clean Systems, now a part of Getinge
Our ultrasonic systems are designed to accommodate all sterile processing needs, from small facilities to high-throughput trauma centers. We provide a comprehensive range of ultrasonic cleaning systems to fit any departmental need and budget.
NewSplash – Current Healthcare News
Central service professionals from many prominent facilities read NewSplash.
With NewSplash, you’ll be among the most informed leaders in the sterile processing and infection control spaces.
Give us a try. It’s truly free!

Explore our products
Find the right products and solutions for you